Organizing Emails II: Yahoo! Mail Filters
In case you haven’t noticed yet, Yahoo! now offers unlimited storage for Yahoo! Mail. This means that you don’t have to delete old emails to keep your Inbox under the storage limit. You can now keep your emails for as long as you like and enjoy limitless storage for attachments and photos. Well, that is, if you comply with their anti-abuse limits.
With an unlimited storage, the number of emails in your Inbox can increase considerably with time. Sorting these emails manually into different folders can take a lot of your time. In this post, I will outline how to use Yahoo! Mail filters to automatically perform this task for you. Like in the previous post, we will create an example filter such that emails from family members will be automatically stored in a “family” folder.
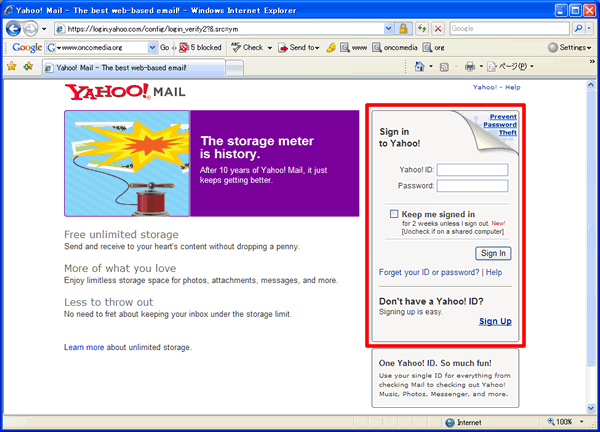 |
| Figure 1. Yahoo! Mail |
To start with, login to your Yahoo! Mail account. Open your web browser and point it to this URL: http://mail.yahoo.com/. Sign in to Yahoo! using your Yahoo! ID and password (see Fig. 1). If you don’t have a Yahoo! account yet, you can also sign up for an account from this page. After signing in, the Welcome page shown below will be displayed.
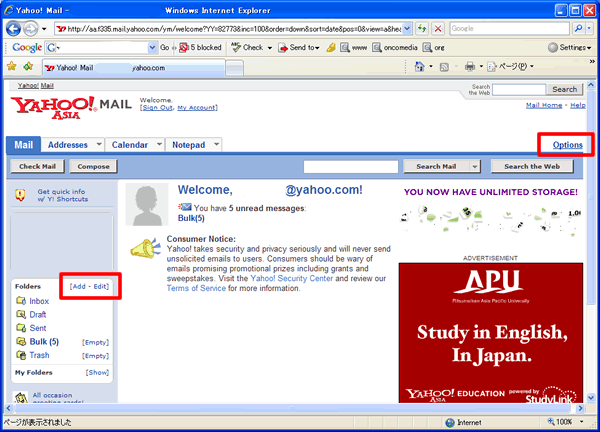 |
| Figure 2. Welcome Page |
First, create the “Family” folder. To do this, click the Edit link in the Folders box located on the left-hand side of the Welcome page. This will display the Folders page shown below. On the left-hand-side, you can find an Add Folder box. Enter “Family” in the text box and click the Add Folder button to create the “Family” folder.
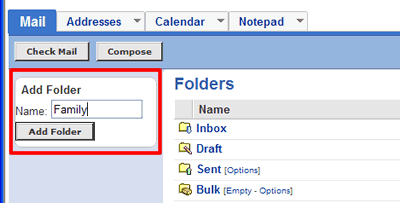
Now that we have the destination folder for our filter, let us create the filter itself. To add a new filter, look for the Options link located in the upper right corner of the Welcome page (see Fig. 2), just above the Search the Web button. Click this link to go to the Mail Options page shown below.
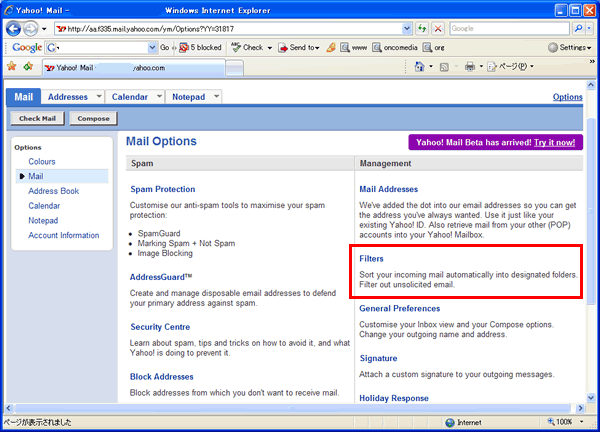
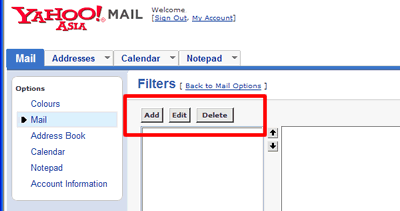
Under the Management column, click the Filters link to open the Filters page (see image below). You can find three buttons here: the Add button that can be used to create a new filter, the Edit button to edit existing ones, and the Delete button to delete unused filters. Click the Add button to retrieve the Add Message Filter page.
In the Add Message Filter page, enter a name for this filter in the Filter Name text entry. For example, enter “Family” as the filter name. In the next row, assign the set of conditions for this filter by specifying:
- What part of the email the filter will scan (From header, To/Cc header, Subject, Body)
- What text to look for or the target text (this can be entered in the provided text entry), and
- How to match the target text (contains, does not contain, begins with, or ends with). You can also specify whether to match the case of the target text by ticking the match case check box.
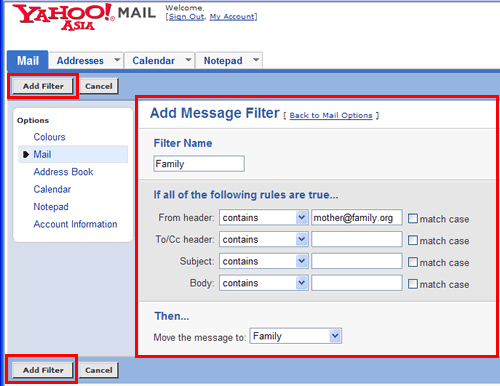
In this example, we will require the From header to contain the email address of a family member, say, mother@family.org. We then specify the destination folder to be the “Family” folder we’ve created earlier. This can be selected from the drop-down list after the Move the message to: label.
Finally, click the Add Filter button to create the new filter. This will bring you back to the Filters page now displaying the newly created filter as shown below.
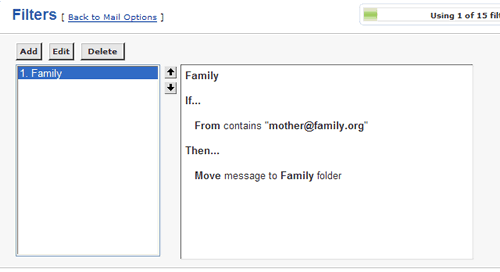
Repeat the above steps for additional filters. Don’t forget to test the filters you’ve just created by sending a test email to your account. And by the way, Yahoo! offers a maximum of 15 filters for free accounts. That said, be sure to use those filters wisely and efficiently for the emails you consider important.
That’s it! Enjoy!


Interesting comparison.